![]()
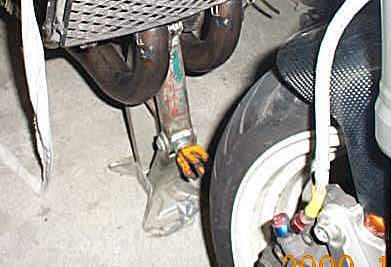 |
You have to lift front section, when
you take it apart. Using the front stand is the best, but I don't have it. This is the simple resolution. But I don't recommend to the habitant in earthquake pronecountry. Oh, Japan is like that! |
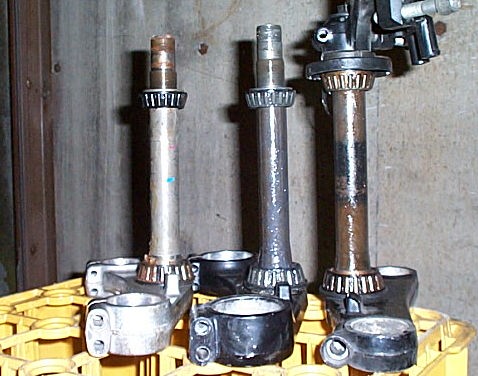 |
Front section of GSXR400RüA750RüARGV Gamma
250 are easier to convert. Photo shows you stem brothers. From right to left, Gamma, '90 GSXR400R-RK (USD), '89 GSXR400R-RK üinormalüj. You can see the difference in the height of the upper bearing. It's possible to set up these triple trees without modification, butyou will experience aome rattling in your handle bar. To make sure, you have to extend the stem shaft exactly 8mm. |
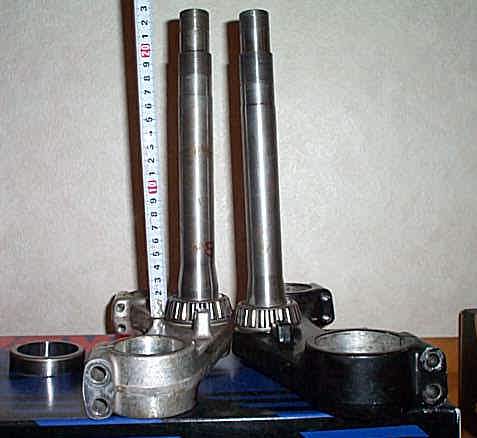 |
Extended Shaft. The distance from the top of under bearing to the bottom of upper bearing is 147mm. |
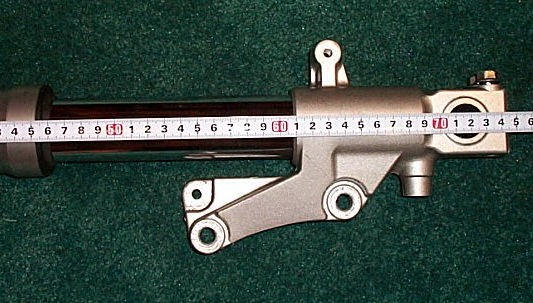 |
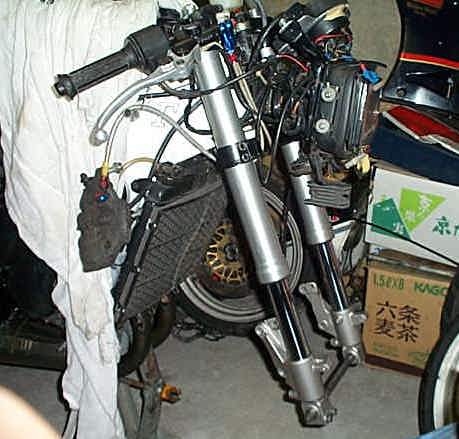
Photo shows you USD fork from '90GSXR400R-RK This is fully adjustable, compression, rebound and stroke. Length of free stroke is 720mm.When I put on 4.5 x 17 inch wheel to rear, these dimensions would make a front low style. Mmmm, like a good old Kennys' YZR. ADVANTAGE SHOWAs' 800mm one would be the best choice but I cant spend $1,700- - - . |
 |
Grease up under bearing with molybdenum grease is right choice. Put the grease not only on the surface but stuff it inside of bearing. |
 |
Do the same thing to the upper bearing. Put
the grease on the bearing surface and slap
it with your hand, then the grease goes inside. Do it untill the bearing is filled with grease Takd care to keep the greased bearing clean. If sand gets into the bearing, it will breake the bearing.If you drop the greased bearing, clean it up and start from the begin.. |
 |
Clean up and put grease on the head pipe,
then assemble the stemshaft, bearings,
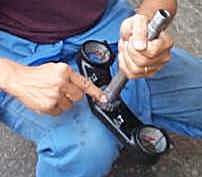
cover and slotted nut. If you screw the nut too strongly, it will spoil the movement. The minimum torque makes the best handling. But torque wrenchs don't adapt to slotted nut. So I screw it as tight as I can, then turnt back the wrench 90 digrees. |
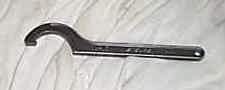 |
You can screw a slotted nut with hummer
and chisel, but you'd better to buy slotted
nut wrench. It's less than $10! Take care to chose correct size. |
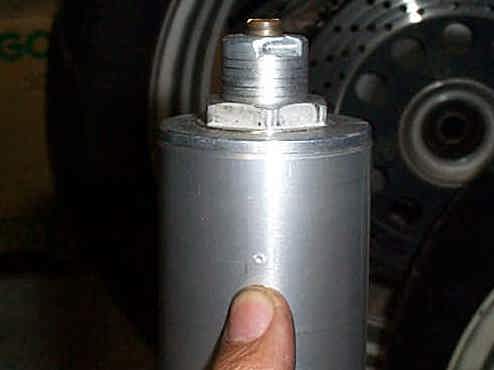 |
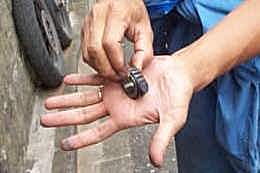
Photo shows you the punch mark. Fork is a tube, so you may think the direction means nothing. But running force does not affect to the slide metal equally. Therefore you'd better reassemble your forks in the original style. This mark shows you thecorrect direction. In my case, this mark is adjusted in the slit of the upper bracket. |
 |
Fork attachment. Insert the right fork and screw the fork holding screw on upper bracket with minimum torque, then insert the left fork and screw the axle shaft in. Raise and lower the left fork to find the best place where you can screw in the axle shaft most smooothly. That is the correct position of both forks. While you maintain your front section, cover the tank with fabrics. It will preventyou from scratching your tank. |
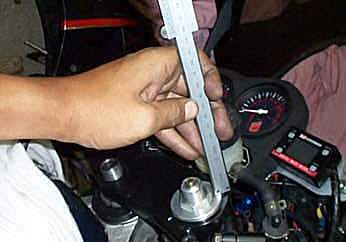 |
Check the height of these forks. If this
height differs a lot, it means that something
is wrong with your fork. For example, twisted axleshaft, different oil levels, springs are too old. In this case, right was 2.0mm and left was 1.95éŹéŹ. |
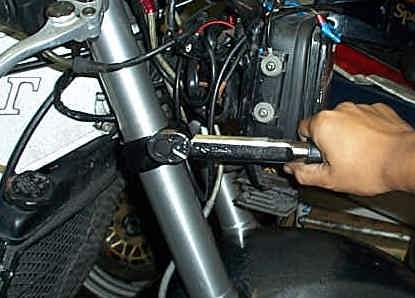 |
Toruque control is more severe in USD forks
than in normal forks. Over torque may distort
outer case very easily. so you have to screw these bolts with torque wrench. Proper torque is 2kgf/m. |
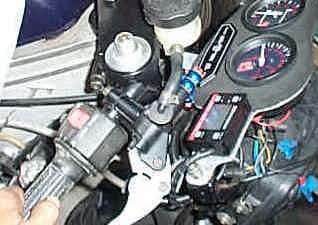 |
This stem needs small modification to apply to Gamma.This front fork system disrupts the meter panel. I made asmaller meter panel with 2mm aluminium panel. Temp. meter is YOSHIMURA digital meter. Fuel gage was removed. |
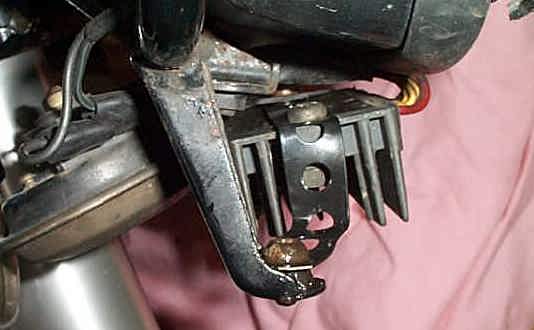 |
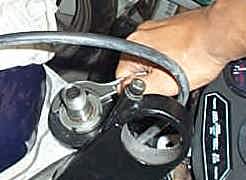
And left fork displaces electric parts (
what do you call this in English? regulator?). I moved it to under the head light. |